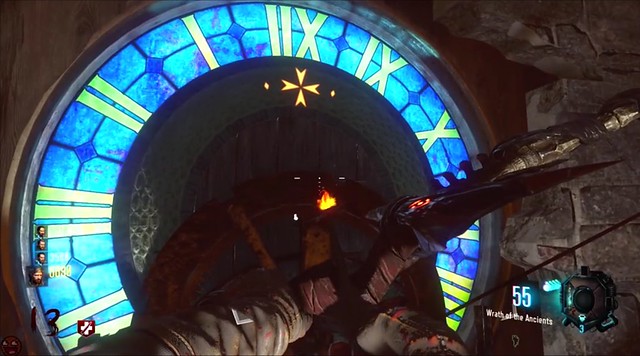
Activision and Treyarch released the latest zombie map for Call of Duty: Black Ops 3. The Der Eisendrache map already has gamers looking for ways to find all the hidden aspects and secrets. In addition to having a basic walkthrough of the map there’s also some guides and tips on accessing the hidden Easter Eggs sprinkled throughout the action-packed zombie map.
YouTuber NoahJ456 has managed to do a complete walkthrough of the Der Eisendrache map from start to finish and chronicled a number of Easter Eggs throughout, including accessing the secret weapons and how to easily defeat the Panzer. You can check out the lengthy walkthrough for the map below, which also includes the ending.
There are a number of Easter Eggs contained within this map from top to bottom. Treyarch jam packed the map with a ton of content.
If you don’t care about a walkthrough of the main map but you are concerned more about how to easily kill the Panzer, it’s chronicled in a very short minute long video that details the method.
You can check out the video below.
To get the Wrath of the Ancients bow, you have to locate the three dragons, feed them and then turn them into stone. YouTuber NoahJ456 walks gamers through the process of getting the bonus weapon. Check out the video below.
The first dragon is through the lab and past the two gates that have to be opened. Pass through the first gate and you should get to a box spawn where you’ll see an iron dragon erected out of the wall to your left. Activate the dragon by killing a zombie directly underneath it. Once it finishes blowing out fire it will begin to slurp up the zombies that are killed beneath it. You can’t kill a whole bunch at once to fill him up quickly; you must kill the zombies one at a time to fill him up properly. After it’s finished eating it will get stuffed and then turn into stone and crumble into pieces. It’s time to move on.
The next dragon is across from where you activate the power. Travel across the castle spires and head down into the laboratory with the different graphs on the circular structures. The dragon head is at the far end of the laboratory up on the wall. Feed the dragon just like the first one to activate it, and then fill it up until it turns into stone.
The third and final dragon is near the perks just outside the room, down the stairs. If you enter the room the stairs leading down into the room should be to your left. Continue down the stairs where you will find another corridor that leads down even more stairs. You should end up in a basement area with a pyramid in the center of the room. When you get to the pyramid turn to your left and stand between the pillars on the left side of the room. You should be facing the pyramid. If you look down there is a blue tablet that will light up if you’re standing in the right spot. You then have to activate each of the tablets on the ground in between the pillars that face the pyramid. Feed the dragon, fill it up, turn it stone and then proceed to go get the Apothecarian Bow.
The bow is just outside the pyramid tomb, up where the knight is. It’s just up the stairs at the end of the room, glowing in a yellow mist. You can then take the Wrath of the Ancients bow.
Now after you get the bow there are some various upgrades that you can get for it as well, Easter Egg upgrades, including an electric buff, a wolf bow and a void buff.
Wrath of the Ancients Electric Bow Upgrade
In the video below Noah describes the process for getting the electric buff for the bow. You can check out the near seven minute walkthrough.
After you get the Wrath of the Ancients, head on over to the Death Ray. Activate the Death Ray and then shoot the dragon sign on the rooftop. It’ll explode and spin around, as it does so be sure to grab the bow parts.
Once you get the part it will start the upgrade quest. Keep your bow out and do not switch off. Your next task will be lighting the bonfires. Light the bonfires by shooting fire arrows at them. The first bonfire is located near the rocket landing pad – it’s on a cliff and you should see it if you’re facing northeast on the pad.
The second fire is located below the spawn point down the cliffside after you take the lift up to the castle. The third bonfire is across the castle walls, located by looking out over the courtyard.
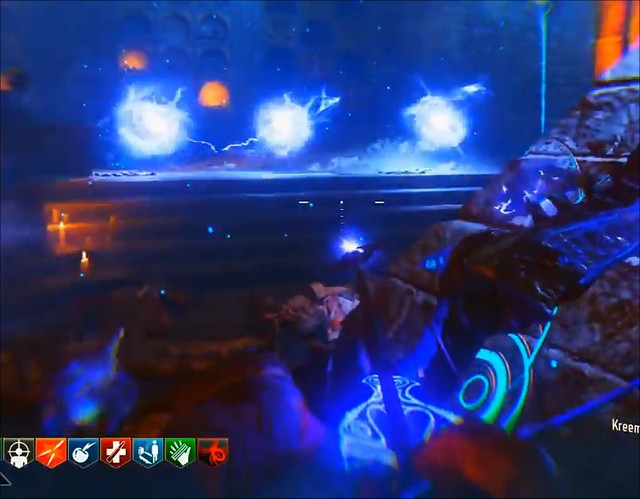
After you activate all the bonfires proceed to head back into the pyramid room and activate the anti-gravity machine. Run across all of the wind-looking squiggly symbols near the Horus symbols on the wall. You should get a confirmation if you do it correctly.
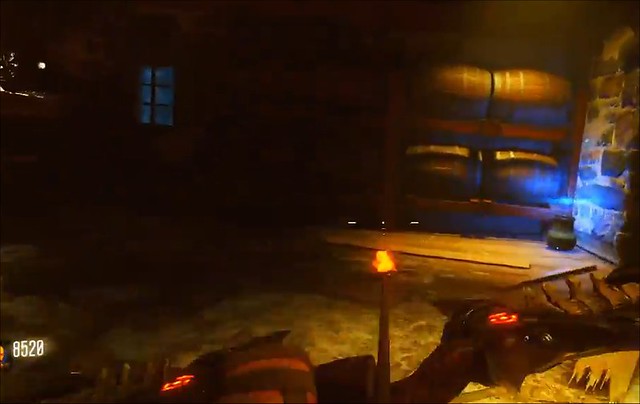
You’ll need then to locate each of the urns around the map. The urns will require to be filled up, so you’ll have to kill zombies to fill up the urns. The first urn is located just left of the spawn area and up the stairs near the glowing blue sphere on the ground. If you go to your right after walking on the sphere you will end up in a room where the urn is in the corner next to some barrels. It should be setting on the ground. Just like in the picture below.
After you fill up the urn, draw back the bow and it should have electricity on the arrow. Head back down to the outside of the castle near the overlook and fire the arrow at the bonfire to turn the fire into an electric fire.
You have to do this each time you fill up an urn.
The second urn is located near the rocket pad, just inside the railway area. It’s back up in a corner on the right hand side.
Fill up the urn, charge up the bow and then fire it into the bonfire. The third urn is located up on the overlook near the Death Ray. Rinse and repeat to complete that part of the mission.
After completing that segment head back down into the pyramid room, hold Square (or ‘X’ on the Xbox One controller) at the altar and it should forge a new bow. It’s not finished yet… it needs souls. You know the drill. Fill up the bow with some more souls and then it will forge an electric arrow pack for you.
It’s not done yet!
There’s another bow upgrade available if you want it. The Void bow.
Wrath of the Ancients Void Bow Upgrade
In order to get the Void upgrade you’ll need the standard bow, of course. Make your way across the drawbridge and enter into the room adjacent to the blue glowing sphere on the ground. Make a right once you get inside the room and once you step inside take about two steps in and then face the wall to the right. Look at the wall and shoot it with the arrow. It should drop some bow parts that will enable the Void bow quest.
There’s a small miscellaneous room off the second courtyard. There’s a purple, glowing square in the center of the room. You’ll need to get a melee kill with the bow just above the glowing, purple square.
The glowing square should explode and reveal a lantern. Activate the lantern to proceed to the next step in the Easter Egg mission.
The next step includes activate six purple, glowing skulls scattered throughout the map. The first one is located near Mulekick, the second skull is just up the stairs off the courtyard in a window sill. The third one is located near the rift across from the teleporter to your right. It’s located in the cluttered sink that has a blood-stained cloth hanging out. You can see where each location is in Noah’s video below.
The fourth skull is located through the teleporter at the launch pad. It’s located on the truck bed somewhat to the right of the area. The fifth skull is in Samantha’s bedroom inside an open chest. The last one is located on the tip of the roof that overlooks the whole stage. It’s just outside the walkway area perched up high.
After activating all six head back to the room where the purple lantern was located and the room should be all lit up. You will have to sacrifice six different crawler zombies and he will then tell you a series of names. You will need to remember the names and the order in which you are told those names. Proceed to kill the zombies near the Death Ray to collect the purple letters that drop from certain zombies.
You will need to collect six letters that drop from the zombies. Head back into the room where you activated the lantern and you must proceed to translate his name from the English language into the Apothegm language. You will need to activate the Apothegm symbols on the statues in the order that you were told his name was. You will put the symbols into place based on the order in which he told them to you.
If you do it successfully you will get the Void arrow that must be taken down to the rift in the pyramid room and charged up. Simply kill the zombies to feed the Void their soul until it’s fully charged. When it’s done press “Square” to grab it and you will have a Void bow at your disposal.
If you want the Wolf Bow upgrade for the bow in the Der Eisendrache map, there are a few steps you can take to get your hands on it.
Wrath of the Ancients Wolf Bow Upgrade
According to YouTuber MrDalekJD, you’ll need first need the original Wrath of the Ancients bow, as described in the parts above. The video below shows you how to acquire the Wolf element for the bow.
You’ll first have to interact with four paintings scattered around the map. The first is in the belltower, it’s near the doorway that leads outside. Once you step through the door it will be to your left. Another painting is in the room past the mineshaft and the other is upstairs inside the church. And the last painting is past the trophy room, on the side of the wall just before you exit the room when you come down the stairs to the left.
You’ll have to access each painting in a proper order – a guitar strum will sound after you activate each painting, so if you do it in the proper order it will reveal bow parts in the basement where the dog symbol is on the wall, which is just on the left side of the stairs that lead down toward the pyramid. The wall itself will explode and the parts will pop out. Grab the parts to begin the Wolf bow quest.
Proceed to the rocket staging area and look up at the cliff face that has a red flag. Proceed to shoot the flag, which will activate a skull that will roll down the cliff. Grab the blue glowing skull once it finishes rolling down the mountain and place it in the box in the keeper’s shrine where the pyramid is located.
A ghost will appear and you’ll have to follow him around. He’ll dig up some areas on the map and in doing so you’ll have to kill zombies in that area to feed the hole until it’s full. Once it’s full activate it by pressing the Square button (or ‘X’ on the Xbox controller) and the ghost wolf will move on to the next location. You will have to rinse and repeat this a total of three times until the wolf ends up underground.
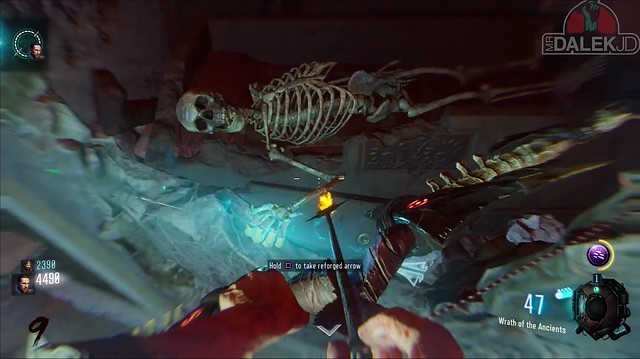
Once that’s finished the wolf will lead you back into the pyramid room where you’ll need to activate the anti-gravity machine and shoot arrows into the hole in the wall just above the wolf with the symbol on it. If you do it properly the wolf symbol will light up and a platform will extend. If you do it successfully a skeleton with an arrow should be inside where you can grab the arrow.
Proceed to take the reforged arrow to the box with the wolf symbol on it and place the arrow on the box. Just like with the other reforged arrows, you’ll need to kill around 20 or so zombies to fill up the wolf arrow with souls.
Wrath of the Ancients Fire Bow Upgrade
You need the original Wrath of the Ancients bow before you can get the Fire bow upgrade. To start the quest for the fire bow, you’ll need to head to the clock tower and head upstairs where you’ll need to shoot the wall to the right once you reach the top. This should unveil the bow parts to start the Fire bow upgrade quest.
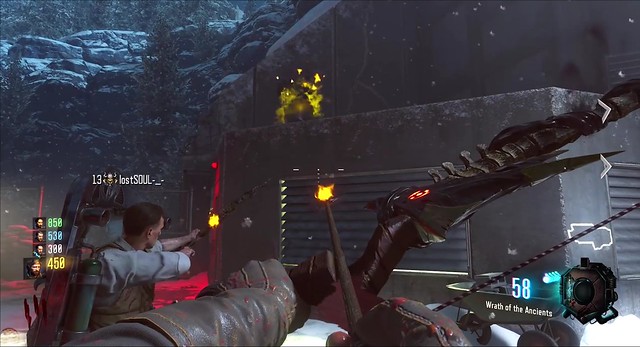
Next, head to the rocket test pad and wait inside while the rocket performs a test burn. You’ll need to exit just as it finishes the test burn and then exit the building and turn to the right once you get outside and there should be a rock on top of a small building with vented windows. Shoot the rock as depicted in the image below.
If you did it correctly then you’ll see a fire projectile blast off from the building and into the sky.
If you mess up and the fire projectile does not fire off, redo the rocket test pad sequence again and try to fire off the fire arrow again until the projectile does go off.
Next, you will need to locate the three rings around the Der Eisendrache map. The first set of rings is on the slope near double-tap. The second set of rings is near the wonder sphere on the roof outdoors near the cliff side. And the third set of rings is on the roof near the computer terminal just outside the the tower.
The objective is to shoot the rings on the ground while using the wonder sphere. You have to use precision aiming to shoot each of the rings while in the air. This is extremely difficult to do but you can see how it’s done by using the video guide below from MrRoflWaffles.
After lighting up each fire ring, you’ll need to fill it up with zombies. You’ll need to kill around 10 zombies to fill each of the three rings around the map.
After finishing this task you’ll need to head back to the clock tower and turn the gear in order to reveal a symbol. You’ll need to write the symbol down as it corresponds with the fireplaces scattered around the map, as indicated in the image below.
Match the clock tower symbol with the fireplace symbol and put the fireplace on fire. However, in order to put the fireplace on fire you will need to do so by chaining shots from a corresponding circle.
This means you will need to find the fire circle that is nearest to the fireplace with the symbol on it that you saw in the clock tower room. Stand in the fire circle and shoot an arrow that will land on the ground close enough so that it creates a little fire mound where you can stand near it to shoot an arrow at the next location. The objective is that you only get four shots but you have to create a link using three shots to get close enough to have the fireplace within view. You also have to be close enough to the fire mound that there is a fire glow in your screen.
If you do it successfully, your third shot should land you close enough that you’re able to target the fireplace and light it up with your last arrow.
You will get an ammo box and an arrow and then you need to head back to the outside where there’s a giant flaming ball. Hold down square to activate the flaming ball and a fire arrow will pop out.
Head all the way down to the pyramid room and place the fire arrow in the box and kill around 20 or so zombies to fill up the arrow. After that the Fire bow will be crafted.
Death Machine Power-Up
Now if you don’t care about the bow but you do care about the Death Machine there’s a way to get a free one.
To get the free Death Machine you have to grab it while in the anti-gravity room. To do so you need to stand on the four different portals in the pyramid room to turn on the anti-gravity machine. When the machine is on you’ll need to wall-run on a blue panel near the back of the room. If you do it successfully you should hear a cha-ching sound. Proceed to wall-run along the walls with the eye of Horus on them. Run all the way around back to the pyramid and there should be a power-up there so you can get the Death Machine. You can see exactly where to wall-run and how to grab the Easter Egg power-up with the video below.
The Death Machine power-up only works once per game and you will have a limited time to get your hands on it after the anti-gravity machine is turned on, so you have to move quick and blast down the baddies once you get your hands on it.
If you don’t care about weapons and power-ups but you just want to see the ending for the Der Eisendrache map and see the cinematic. You can check that out below, courtesy of NoahJ456.
Call of Duty: Black Ops 3‘s Der Eisendrache zombie map is available right now as part of the Awakening DLC. It’s available right now for PS4 and will launch soon for the Xbox One and PS4.
