Guerrilla Games’ Horizon: Zero Dawn has been one of the more highly awaited titles this year. The PS4 exclusive has managed to draw a lot of positive criticism from the gaming press and is aiming to be the big AAA blockbuster seller for the PS4 in 2017, mostly thanks to the robot dinosaurs the game features. Those looking for a gameplay walkthrough of Horizon: Zero Dawn can find one right here.
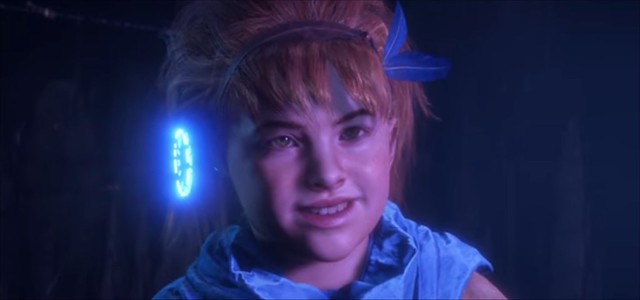
Over on YouTube, the first part of the game was posted up by ShackNews. It starts right from the very beginning, where the credits roll while a lengthy cinematic plays that introduces Aloy and Rost as outcasts. Nearly six minutes of cinematics will play before you even get to the game’s options menu.
You can choose the game’s difficulty settings and basic controls before starting the game.
Before you can actually play there’s another cinematic that plays, which eventually leads into the actual game where you play as a young Aloy.
Just follow the the linear pathway until you reach the fossilized body with the triangular head piOnce you get your hand on the device you can use it to scan rooms and find mission objectives by pressing in the R3 button.
Scan the computers in the room with the electronic interface and use Square to activate the console. This is how electronic doors can be accessed in the game.
The game proceeds into the tutorial phase, where Aloy will learn how to gather up supplies, stealth, and hunt for robots.
They also teach you to throw objects from your inventory using down on the digital pad when the rock is selected.
You can quickly harvest materials pressing Triangle to gather resources from dead robosaurs. You can then craft arrowheads from the nearby resources and the dead robosaur parts.
They also teach you how to target the weak spots on a robosaur using the HUD device by tapping R3 when a robosaur is nearby.
They also teach you how to tag robosaur tracks by tapping R3 and then holding down the right trigger to highlight a robosaur’s travel pattern.
After completing the stealth segment you’ll encounter one of the multi-choice moments where depending on the choices you make will alter the outcome of a scenario.
After the 40 minute tutorial, you’ll be able to save your game finally by visiting a bonfire.
The first two major open-world quests take place under the mission The Point of the Spear. You’ll take on are gathering blaze from Striders and getting metal shards from the robosaurs. You’ll also gain access to Aloy’s skills, crafting, upgrades and weapon customization.

There are some side-quests you can pick up as well, such as helping a man find his missing daughter. The main mission is to acquire some necessary gear to prep for the Proving Ground.
The missing girl will be surrounded by some robosaurs while stranded on a platform. You’ll get a few supplies and be able to rescue Arana, as demonstrated in the video below from TetraNinja.
To get the spear back for Arana, use the focus to track the robosaur up into the snowy gorge.
If you climb up top you can use the robo-bow to snipe the dinos.
You can also head to Karst to purchase a tripcaster if you have a lens from one of the watchers.
For the main mission, after you get the supplies from up top the mountain where you can practive some of Aloy’s parkour, you can then meet with Grata, and from there meet back up with Rost.
You’ll have to take down a Sawtooth by hunting it. You can use whatever skills and equipment you have available – you can use the R3 scanner to check the weaknesses of the Sawtooth, as demonstrated in the video above at the 1:26:00 mark.
You can use the tripcaster to set a trap for the Sawtooth.
Once you kill it you’ll be greeted with another cinematic and then head to Mother’s Heart to talk to Rost.
Before the Proving you can examine the town and talk to some people, including Teb, who will give you a free outfit.
Karst, the fake Ben Kingsley, is also there in the town where you can purchase some supplies before the Proving.
There are more lengthy cinematics and a few dialogue sequences. Erend explains that each year the machines have become more and more deadly, especially while the tribes fought.
There’s mostly a lot of dialogue from Erend about the history and lore behind the various tribes.
More dialogue will take place ahead of the Proving.
The first challenge is killing some robo-deers.
Shoot them in the face or the canisters on the back; grab a trophy and head up the cliff-side.
Race through the parkour segment to cue another cinematic and then flank the snow men and beat them in the arse with your stick; arrows don’t work so well.
Continue to kill the waves of the baddies.
The black girl and her boyfriend captain “Bost” McDouchery both die, and you’ll need to kill the remaining snow men.
Take out the guy with the gun to use it to kill the remaining evil tribesmen.
Another cutscene will play after Rost gets murdered while trying to save Aloy.
Move through the Matriarch’s secret mountain club and use the Focus to track down your weapons and gear.
Aloy will finally see her mother and discover where she was born. The Matriarchs will reluctantly grant Aloy the title of the Seeker and will send her out to explore the land and discover a way to track down the evil tribe killers and find out how they’ve managed to control the machines to kill other tribes.
You can grab some equipment and resources scattered around the village before you leave. The video below shows you where to get all the items you might have missed the first time around.
Talk to Teb who will direct you to talk to the War Chief in order to exit the mountain and venture beyond. However, first you’ll have to fight some Striders and the demonsaur.
Attack the cylinders atop its head. Use the buildings as cover when it goes to ram or jump at you. It’s a hard boss fight and you’ll need to whittle down its life. You can gain access to the control unit so you can take control of other robosaurs like the striders, which will allow you to use them as transportation.
The mount override can be tested just outside the gates; approach a Strider undetected and then use the override staff to incapacitate the Strider and then control it. Stealthily sneak up to the robosaur you want to control and hold down Triangle using the override staff. This works on many different robosaurs, but not all of them can be mounted. Some will accompany you and fight by your side as an ally, as demonstrated in the video below.
Only certain bows can use certain ammo. So you’ll want to purchase a war bow if you want to use some advanced arrow ammo types, such as the electric arrows. You might also want to craft a new pouch for the war bow ammo, as well as consider customizing your modifications to suit your play-style.
There’s a side-quest where Olara will request Aloy to find Brom, her brother.
You’ll need to go examine Brom’s camp, and kill the Watchers while tracking his movements and whereabouts. Kill some more of the robosaurs before you find Brom up on a cliff’s edge.
After you acquire a mount and head to the gate, Varl will require you to ask Aloy to find Sona.
You can also call mounts using the digital pad if you assign it to your tool menu.
The Hunter’s Lodge can be encountered where players can go on various trials to increase stats, earn marks and score some fat loot.
There are a number of side-quests you can also pick up along the way.
Continue the War-Chief’s Trail once you get done with whatever side-quests you have, and as you talk to some of the NPCs at the nav points, they’ll direct you toward Sona’s last known location. You can see which way to go and how to get there with the video walkthrough of Horizon: Zero Dawn provided by MKIceandFire.
As usual, you can use the Focus to track Sona’s whereabouts, which will lead you to some corrupted machines.
After another short cinematic, Aloy and Sona will team up. You’ll be tasked with sneaking in and killing the cultists and corrupted machines down in the gorge. Use the fire arrows on the explosive blaze containers to take out groups of the cultists and machines.
Varl will meet back up with Sona while Aloy will give herself the task of investigating the dig site. Once you investigate the bodies there you’ll need to head to Devil’s Grief.
Head through the bandit camp and silently take out the bandits in their camp. Stealth is advised.
Once you clear the bandit camp of all the enemies you’ll be able to talk to some of the outcasts before heading to the Red Echoes. There will be a variety of robosaurs you’ll need to fight through to get to the camp site.
The next mission involves clearing out the camps for the Nora. They’ll be marked on your map; guide Aloy through the herds of the robosaurs to get to each of the enemy camp sites.
YouTuber RabidRetroSpectGames also has a full walkthrough of Horizon: Zero Dawn from start to finish covering mostly just the main missions. The game clocks in at just under 12 hours. It’s contained all within a single video that you can check out below.
If you specifically need help with Horizon’s final boss fight and taking him down, there’s a video up that walks you through the process of defeating the bosses. Following the anti-climatic demise of Helis, Aloy will need to take down the Ridge. You can use the cannon to get the job done, making quick work of the machine onslaught. The machine waves will get increasingly difficult, however the segment is basically a shooting gallery, so just keep shooting all the robosaurs down until the cinematic kicks in.
The final final boss is a Deathbringer, which is a multi-stage fight against a giant machine that’s not a robosaur but basically just a giant killer mech that looks like a Metal Gear unit on mega-roids.
Horizon: Zero Dawn is available right now exclusively for the PlayStation 4 and the PlayStation 4 Pro.
