Nine Dots Studio’s Outward has proven to be wildly popular and very challenging. It’s not an easy game, which means it can’t be played by many game journalists. However, for gamers out there that are trudging through the adventure and need a little help gaining their bearings and ironing out a pathway toward the mountain of success, there are some walkthrough guides available for Outward to at least help you get started in the right way.
YouTuber ESO – Fallout & Elder Scrolls Guides put together a rather detailed series of videos to help walk you through the basics of Outward, giving you an idea of how to set up your weapons, your storage, your combat methodology, as well as the best ways to travel around the very large and spacious world that Nine Dots has created. You can check out the walkthrough playlist series below.
At the start of the game, you can choose to play in single-player or co-op mode with two players, either on PC or home consoles.
Once you select single or multiplayer you can then hop into the character creation, which includes being able to choose your gender (there are only two, thank goodness) and your race. You can choose the face style (there are only six options), the hairstyle, and the hair color.
Let’s just get this way out of the way: the character creator sucks and the characters are hideous.
Once you get past the poorly done character creator you’ll be able to hop into the actual game, which gives you a quick prologue before you get into the meat and potatoes.
After the prologue, your character will start with nothing. You’ll have to go acquire some tattered clothes along the beach and make your way up the hill to talk to the NPC. Grab some supplies and the gaberries from the nearby bushes.
Make your way along the rocky hills leading toward the lighthouse and to your left, there’s a dead body with a machete on it. Take the machete and fight the dog.
As the video explains, if you’re playing on PC you can use Tab to lock onto enemies and then block with the mouse. You can also kick. The video notes that you’ll want to dodge and kick enemies when possible because kicking will stun an enemy.
If you take damage then open the inventory, click on the bandages, and use them to heal yourself. You might also want to check your stats to make sure you’re not dehydrating. If you are dehydrating then go to the nearby lake stream and drink the water to replenish your water levels.
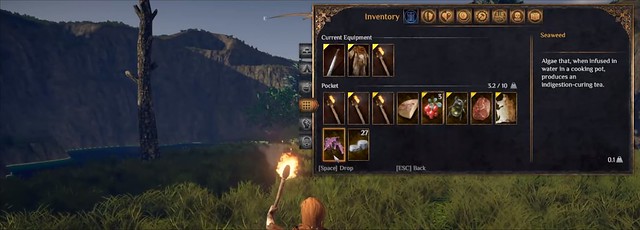
Once you get done gaining items from the area and testing out your combat abilities, head back to the NPC by the camp and sleep. The game will then transport you to the lighthouse.
Take the backpack and head outside. A short sequence will play where a bunch of NPCs, led by Rissa Aberdeen will demand you repay the money you owe them.
The mission will require you to acquire to collect 150 silver coins within five days.
There’s an alternative to completing this mission instead of collecting 150 silver coins. You can exit the town, travel down to the beach east of the town, and there’s a lad on the beach who is injured. If you have a spare bandage and bandage him up, he’ll give you a writ that will satisfy the blood oath and you won’t have to pay the 150 silver. The downside to this quest is that you’ll have to sneak past several crab creatures who are quite strong and they can fire magical projectiles at you, so it’s something to keep in mind as you adventure throughout the game world.
You can explore the town and take a few items from the houses where there’s no one around because if they see you stealing stuff you’ll be in right awful trouble.
However, go down the hill and talk to Helen Turnbull, who has a quest for you nearby that will allow you to earn 70 silver from collecting a rare mushroom from Blister Burrow.
You can also learn about the game’s magic and alchemy system by talking to Helmi the Alchemist.
Talk to the blacksmith to learn about the weapon system and pick up a few quests from some of the NPC shopkeepers.
Feel free to talk to the NPCs at the docks to pick up a few more quests, and you can also head along the beach to talk to Yzan and pick up another quest to retrieve some treasure from a shipwreck to the south. There’s also a water pouch near a fountain you can take and fill it up with some freshwater.
Just down the beach from Yzan’s location, there’s a fishing pier with a fishing rod there. You can take the rod and catch some fish.
If you go under the docks you’ll also be able to enter into the Cierzo storage area. Inside the storage, you’ll find some useful tools such as an axe and a mining pick.
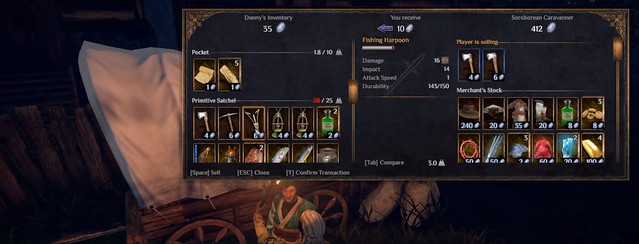
Use a torch and venture into the cave system where you’ll find a few ore deposits that you can use to acquire some goods, as well as fight two troglodytes. You’ll want to fight them one at a time. They aren’t terribly difficult, just remember to dodge their thrust and then kick them to stun them or attack them to whittle down their life.
Also, be sure to grab every recipe you encounter along the way because they’re very useful.
Once you gather the loot from the storage area, head home, go into your kitchen, there’s a recipe for Cierzo Ceviche. If you picked up the quest for Cierzo Ceviche from the cook by the docks, you can easily complete the Cierzo Ceviche quest by right-clicking on the recipe in your inventory to learn it. Go over to the kitchen to craft the Ceviche if you have the necessary ingredients and then take the Ceviche back to the cook to complete the quest and earn some silver.
Once you’re ready to complete some of the other quests outside the village, be sure to store all the unnecessary equipment in your home and only take what you need in your backpack.
When it’s time to exit the village, the guard will teach you a skill you can learn for the weapon you currently have equipped when you talk to him.
The skill he teaches you will need to be equipped by opening up your character skill menu and then equipping it in your hotkey bar.
Once you’re ready to take on the berry quest, you’ll need to head northwest along the edge of the map. The location for that quest is marked on the map below.

Be sure to have several torches in your backpack because you’ll need them to scout through the Blister Burrow cave
There are a handful of troglodytes in the cave; be sure to only fight them one at a time otherwise they will overwhelm you and kill you. Also when you’re fighting be sure to time your attacks so that you block or evade the enemy attack and then strike. When you start off play smart with the way you fight.
If you clear them out and move into the mana room you’ll fight a mana troglodyte.
Also, be sure to bring your pickaxe with you because you’ll be able to mine a mana stone down in the cave.
Once you grab the garnet from the ash giant, grab the mushroom from the center of the cave at the bottom of the cavern. Proceed to collect all the mana items and then you can exit the cave. Head back to Helen Turnbull and give her the garnet you picked up from the ash giant corpse along with the rare mushroom. You’ll earn 100 silver from that quest alone, and then you can sell any of the other items you collected in order to make the extra 50 silver you need to pay off the blood price.
Once you get the 150 silver go talk to Risa Aberdeen inside the town hall.
Once you pay off the debt Rissa Aberdeen will give you an additional mission that involves talking to Yzan before he and Rissa’s daughter leave Ciezro.
You’ll find Yzan down by the beach. You won’t be able to join him until you learn some new skills.
You’ll find Rissa’s daughter, Oliele, by the blacksmith. Talk to her and she’ll tell you to meet her in the Hallowed Marsh.
Once you get done talking to those two go talk to Rissa just outside the town hall. She will encourage you to join her.
Now before you go venturing outside the city or going on any of the other quests, it’s best you purchase a large backpack as soon as possible. You’ll need the backpack so you can carry more items and all the necessary tools you’ll need to survive on your own in the wilderness.
Also, remember that when you get into a fight, drop your backpack so that you won’t be encumbered when you attempt to roll and dodge out of the way.
Another thing worth keeping in mind is that you don’t need actual recipes to create recipes. For instance, so long as you manually know the ingredients of a recipe, you can create the meal or item from the manual section of the crafting menu.
In the video, ESO also teaches you how to take on ranged projectile enemies by sneaking up behind them, as well as utilizing proper timing to stun the enemies after getting in close and wailing on them until they get stunned and then doing as much damage as possible.
Now if you’re not entirely keen on slowly grinding your way up to fame and fortune, and instead you want to become a powerful mage in the land, there is a guide from ESO that teaches you how to do so.
A lot of gamers definitely want to learn how to make use of the mana abilities within Outward so that they can wield magic. ESO walks you through the lengthy steps on how to unlock those abilities and eventually become a magic wielder.
