Saber Interactive and Paramount Pictures’ World War Z is one of those AA games for PC, PS4, and Xbox One that pretends to be an AAA game and kind of struts out into the waters only to find itself in a giant blue ocean, admired by a few people in a nearby dingy but ignored by most beach goers on shore. I could be wrong and it could be a huge AAA blockbuster-selling third-person shooter, but we won’t know that for sure until the sales numbers drop. In the meantime, if you were one of the few people in the dingy looking for a gameplay walkthrough, you came to the right place.
The game starts in New York on a rooftop with four survivors, two girls and two black guys… because “diversity”, of course. The whole game can be completed in just over three hours, with each segment being roughly 40 – 50 minutes each, depending on your skill level and teammates. YouTuber RabidRetrospect Games has the full playthrough, which you can check out below.
At the very start of the first level your objective is to get to the ground level and reach the subway. Go through the door and make your way to the elevator. There are basically just office rooms with zombies inside.
Make your way to the elevator; there are a few guns and some ammo refills next to the elevator. Once you press the elevator button and armored cop (also known as a Bull) that will charge at you from behind. Simply light him up with your gun until he drops.
A hazmat will also come down the hall along with a creeper. Take them out and get into the elevator.
In the next segment you’ll have to make your way through the atrium and to the ground floor.
You can either stealthily take out the zombies or run and gun through. The reason you might want to use stealth is because it can spare you from having to to fight larger hordes. Don’t worry, though, you’ll still have to fight plenty of swarms.
The next objective is to clear out the atrium of the hordes and prevent them from climbing up to the next floor. It might be wise to have one person watch the back wall and prevent them from climbing up to your level while the others focus on the bulls and hazmats coming from the other directions.
When the main hall is cleared, head down through the elevator shaft and you’ll have a minute to prepare your defenses to keep the zombies from getting to you.
There are plenty of weapons to help you out. It might be wise to start with the light-machine gun and then switch over to the grenade launcher if you run out of ammo (or vice versa).
You won’t be able to proceed until the entryway is completely cleared out.
When the finish that task head outside to your left, and follow the street to the subway. Kill the zombies along the way until you reach the subway. You’ll then need to acquire five crates for the subway driver.
There are a number of creepers in the stage that lurk around, honing in on you via sound.
Each of the crates are highlighted on the map in each of the attached rooms to the subway.
That finishes the first segment of the New York Level.
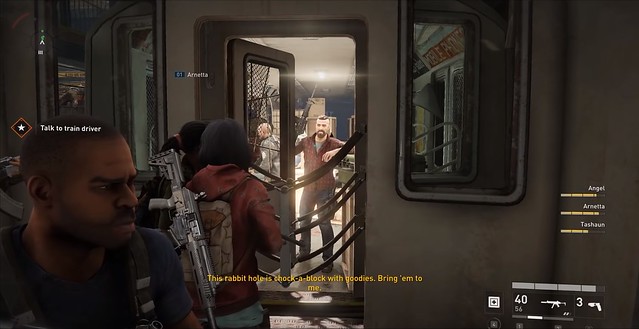
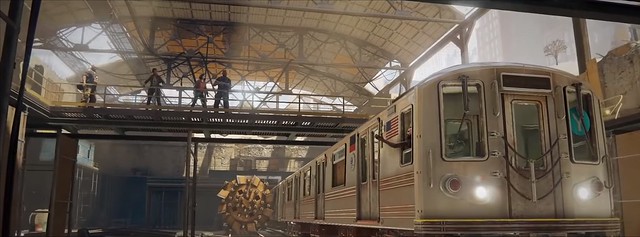
The subway train will stop and you’ll then need to make your way through the maintenance areas to get the tunnel door open.
Follow the linear navpoints on your HUD to each of the gate switches.
This will eventually lead you to a large control room. You’ll have the choice of either going in guns-a-blazin’ or stealthy.
Remember that going stealthy prevents them from swarming, and once they swarm it’s a lot harder to crowd control them.
Once you take the initial group of zombies along the walkway, head into the control panel in the center of the map and activate the lever.
This activate the door so the train travel past the first door. However, you will have to fight a bunch of zombie hordes that spill in from a number of directions.
Make sure you have a proper heavy weapon equipped to make sure work of the undead chaff.
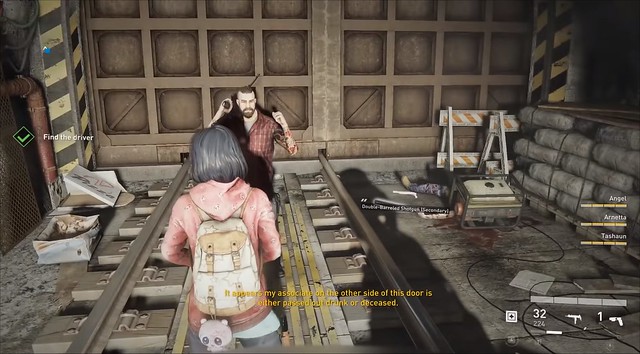
The subway will travel through the first gated area but then you’ll need to drop down a level and clear out the air using the ventilation controls.
Before you can proceed, however, you need to get the key from one of the walking dead.
You’ll need to search bodies along the pathway. You’ll need to manually check the bodies for the ventilation console key.
Check each body on the ground with a HUD marker on it to find the proper key. Your map outlines where you need to go to complete mission objectives so definitely use that as often as possible.
You’ll need to find three activation keys to activate the ventilation system. Make your way back to the main control panel after heading up through the lower levels.
Back at the train stop, you’ll need to activate another lever and then protect the subway from the swarms. It might be wise to have two people guard your position and then two people keeping the train absolutely clear of zombies.
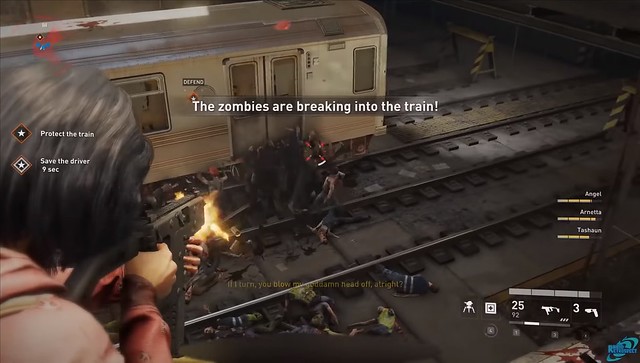
Take note that just the zombies clawing at the train will be enough to damage it and you could lose the mission if you don’t keep it clear.
In addition to defending the train you’ll also have access to the traps again.
If you can successfully defend Stevie’s train, then it will complete the mission.
The next mission will put you near the streets on the way toward the evacuation site.
You can either stealth your way through the streets or you can Rambo the zombies to bits and pieces.
Proceed through the wayhours and follow the tunnels under the train scrap yard and it will take you around to the exit on upper level.
Before you can get out of the subway storage arena, there is a control panel; activate it.
This will commence another brief segment where you’ll need to defend your position. The zombies will all spill of and over the subway cars for a little co-op target practice.
Use the train to smash through the exit to get out of the train depot.
A couple of bulls will be mixed in with the hordes, but if you have traps you can attach them to the electric fence to help stave off the attackers.
The exit out of the depot leads into a sewer and then follow the sewer tunnels up into the museum.
From here, the game keeps players moving.
You don’t have to stop and fight, just keep moving through the streets until you reach the military auto turret. Activate the turret and keep moving until you reach the wharf.
Head to the docks and activate the winch to reel in the boat.
While the boat is being reeled in you’ll need to hold off the hordes.
To make things difficult, the winch will occasionally shut off, so you’ll have to head back to it to reactivate it.
It only takes a second to reactivate the winch, but it also only takes a second to get clobbered and overwhelmed by the zombies. Once the boat reaches the shore head to the boat to complete the mission and move on to the Israel stage.
The Israel stage starts at night and is focused on stealth early on. You’ll need to make your way through the checkpoint and head up to the loudspeaker.
Once you get up on the ramp use the loudspeaker to lure the zombies to your location. Before you activate the loudspeaker, be sure to set down your traps first because once the speaker is activated the zombies will flood the location.
Also be sure to stockpile on weapons and ammo this way you’re not scrambling to find gear.
Once the position has been successfully defended, proceed through the buildings, barricade the doors behind you, make your way up through the roof, and down into the streets. Now be careful because if you stop to fight they will swarm you, so either make sure you fight them off or just make a run to Greenwald’s house.
Inside the house you’ll need to clear out the zombies and then defend the house until you can make a run to the next position.
If you’re playing with other people it might be wise to have someone use a secondary stealth weapon while someone else uses a heavy secondary this way you’re able to quickly take out the screamers, because the screamers are the ones that will make things a heck of a lot harder for you.
Defending the house is no easy task if you’re with an incompetent group of players or you’re stuck with the AI for teammates.
If you’re playing solo the best tactic is to keep moving and securing the perimeter, but if you’re with a decent team just have each person assigned to a location.
Finish defending the house and then proceed to the consulate area to get the two briefcases.
The first case is upstairs while the second briefcase is inside a separate building across the street. If you’re careful you can stealth your way up to the second floor and grab the second launch code briefcase.
You’ll need to head back to Greenwald’s house and escort him across the rooftops to reach the extraction points.
Clear out the zombie pyramid and then head around to the other side and clear out the second pyramid of zombies.
There might be some screamers on the roof, so watch out for them as well. Once you clear out both pyramids you’ll need to defend the helicopter for several minutes.
This part is actually not that hard if you just make sure you rout the position of the zombies so they can’t easily get to your position. Once you defend the helicopter the mission will end.
The team makes their way to the power plant in hopes of getting to Rah-Ahm Base so the Dr. can make use of his launch codes.